myMSC FAQ | Shipping instruction | SI for myMSC booking
Hướng dẫn gửi Shipping Instruction (SI) cho đặt chỗ trên myMSC (SI for myMSC booking).
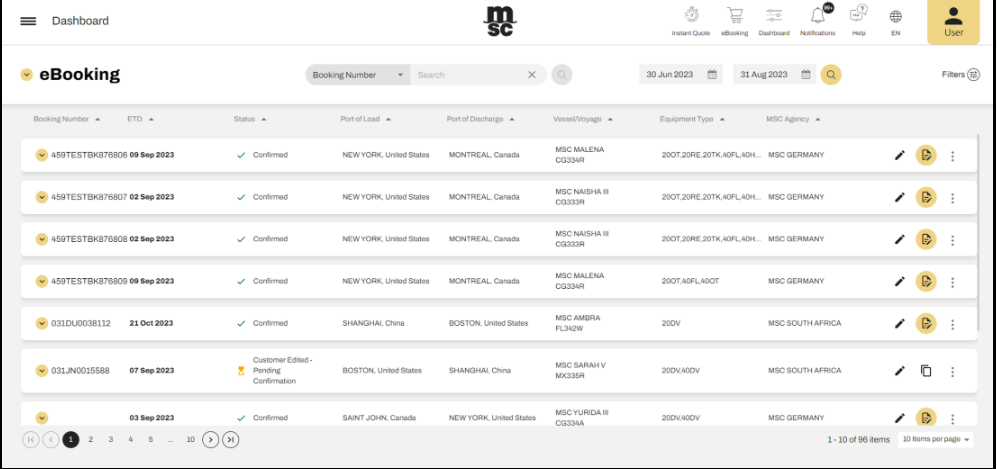
Việc tạo Shipping Instruction (SI) chỉ có thể thực hiện khi trạng thái đặt chỗ hiển thị là “Đã xác nhận” (Confirmed)
(It is important to note that a shipping instruction can be created only when the booking status is available as ‘Confirmed’).
Để tạo SI, điều hướng đến Dashboard → eBooking (Shipping Instruction can be created by navigating to Dashboard → eBooking). Nhấp vào biểu tượng “Create Shipping Instruction” (Click Create Shipping Instruction icon).
Bạn có thể di chuyển nhanh đến các phần cụ thể trong trang Shipping Instruction bằng cách sử dụng bảng điều hướng bên cạnh.
(You can move to a specific section of the Shipping Instruction page using the lateral panel).
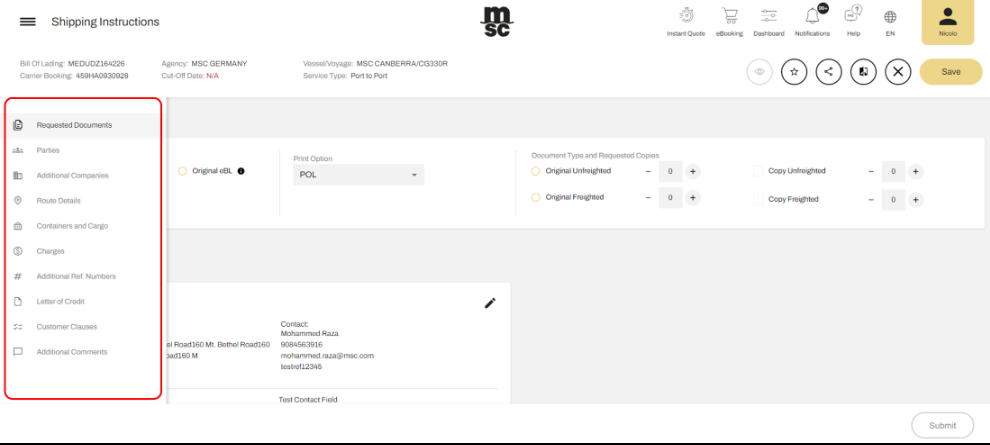
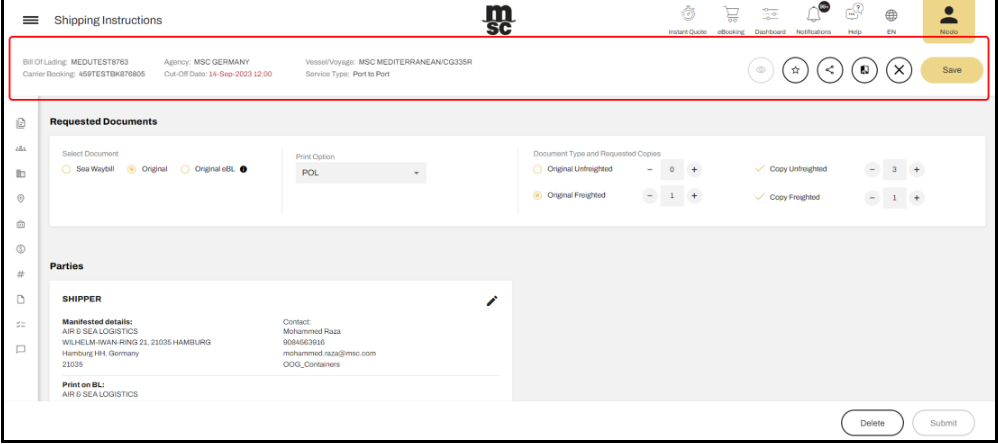
Phần đầu tiên của trang SI cho phép bạn (The first section of the page allows you to) chọn loại tài liệu yêu cầu và số bản sao cần xuất (select the type of requested documents and number of copies).
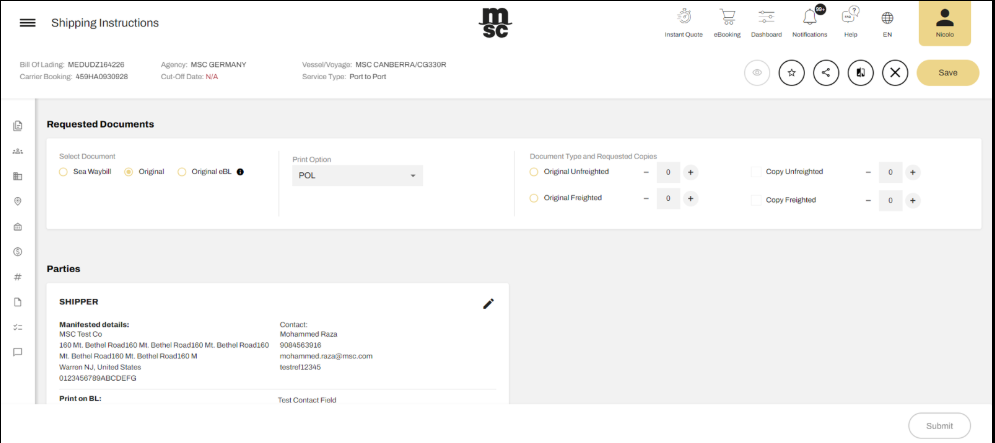
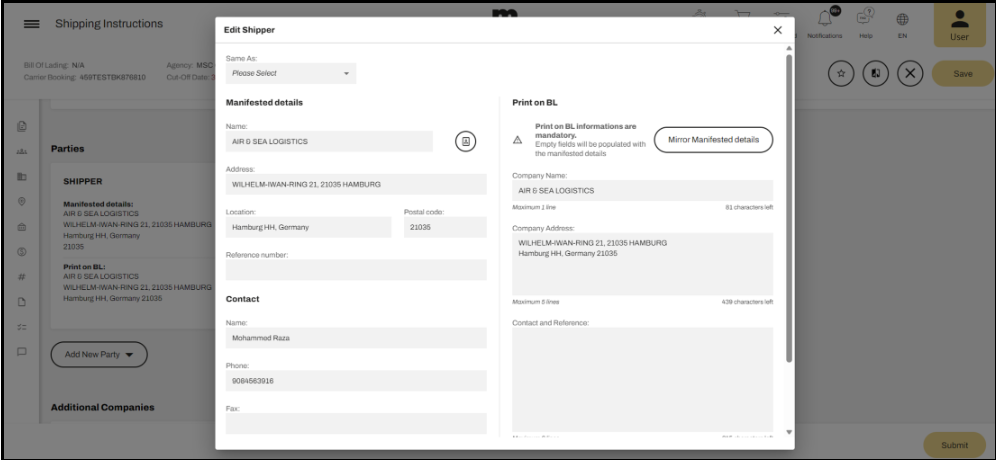
Nếu cần chỉnh sửa thông tin các bên liên quan (If you wish to edit Parties on the SI), nhấp vào nút ‘Edit/Chỉnh sửa’ (click on the Edit button).

Giống như trong Bước 4 của eBooking (As explained earlier in eBooking, Step 4 Parties tab), cửa sổ chỉnh sửa cho phép sao chép thông tin từ các bên đã nhập trước đó (the Edit party pop up window allows you to copy the information from other parties which has the details populated).
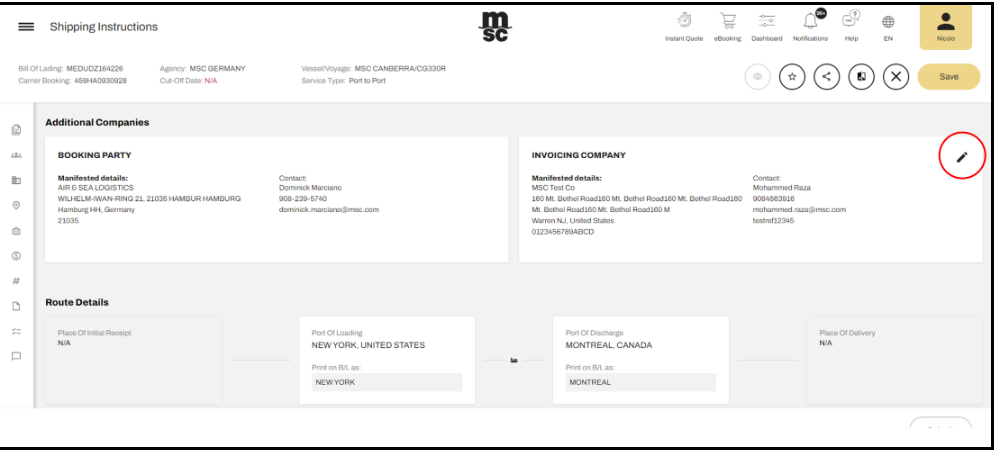
Tương tự, bạn có thể Thêm/Chỉnh sửa thông tin về ‘Invoicing company/Công ty xuất hóa đơn’ trong mục ‘Additional Companies/Các công ty bổ sung’ (Similarly, you can Add/Edit the ‘Invoicing company’ beneath the ‘Additional Companies’ section).
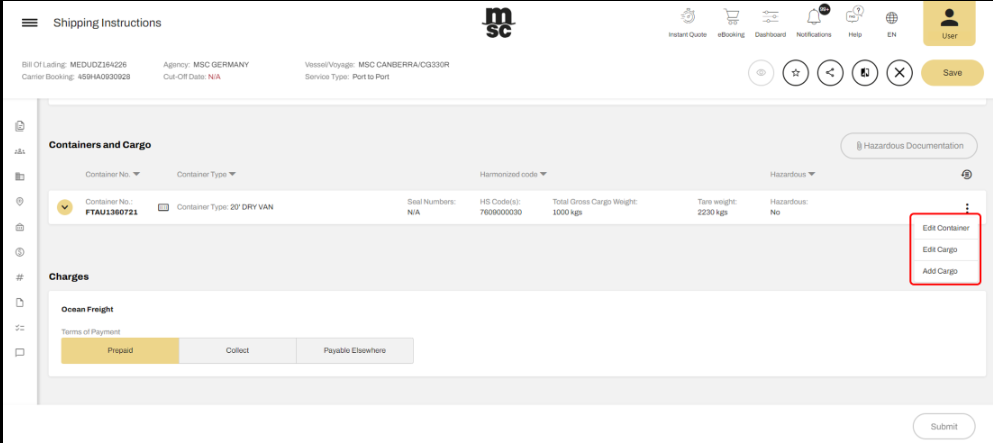
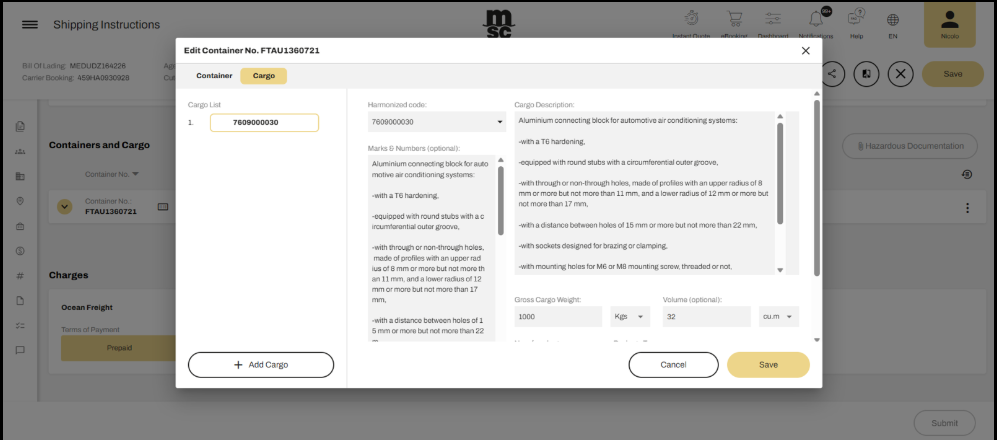
Bắt buộc phải nhập đúng Số container trong phần Container/Cargo (It is necessary to specify the correct Container number in the ‘Container /Cargo’ section). Shipper Seal có thể được cung cấp khi có sẵn (The ‘Shipper Seal’ can be provided once it is available). Nếu cần chỉnh sửa chi tiết container và hàng hóa (If you wish to edit container and cargo detials), bạn có thể thực hiện các thao tác sau (you can click the following actions):
✔ Chỉnh sửa thông tin container (Edit Container)
✔ Chỉnh sửa hàng hóa (Edit Cargo)
✔ Thêm hàng hóa (Add Cargo)
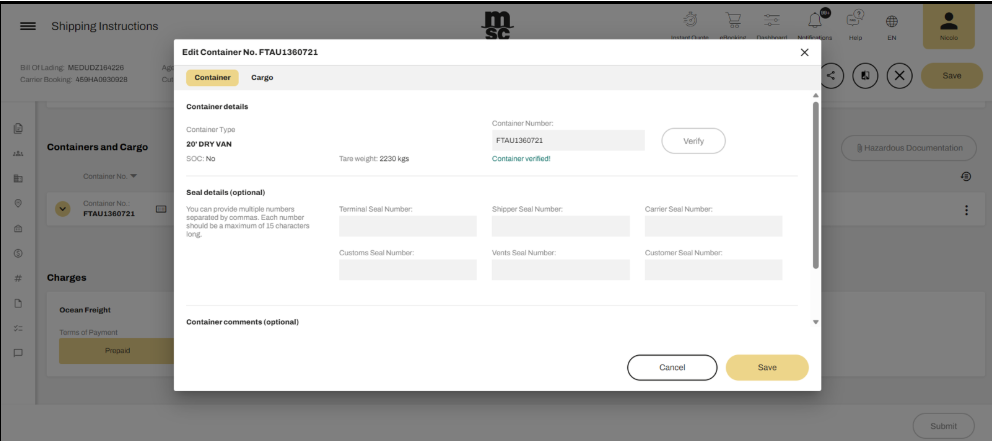
Nhấp vào ‘Edit Container/Chỉnh sửa thông tin Container’ để cập nhật thông tin container và seal (To edit the Container details and Seal Information, click on ‘Edit Container’). Cửa sổ “Container” sẽ mở ra, và bạn có thể nhập thông tin chi tiết vào tab cụ thể (The ‘Container’ pop up window will open, and the details can be entered in the specific tab).
Nhấp vào ‘Add Cargo/Thêm Hàng hóa’ để thêm thông tin hàng hóa (Click on the ‘Add Cargo’ button to add the Commodity Details). Cửa sổ “Cargo” sẽ mở ra (The ‘Cargo’ pop up window will open). Nhập các thông tin bắt buộc và nhấn ‘Save/Lưu’ (Provide the mandatory information’s (not market as optional) and click on ‘Save’).
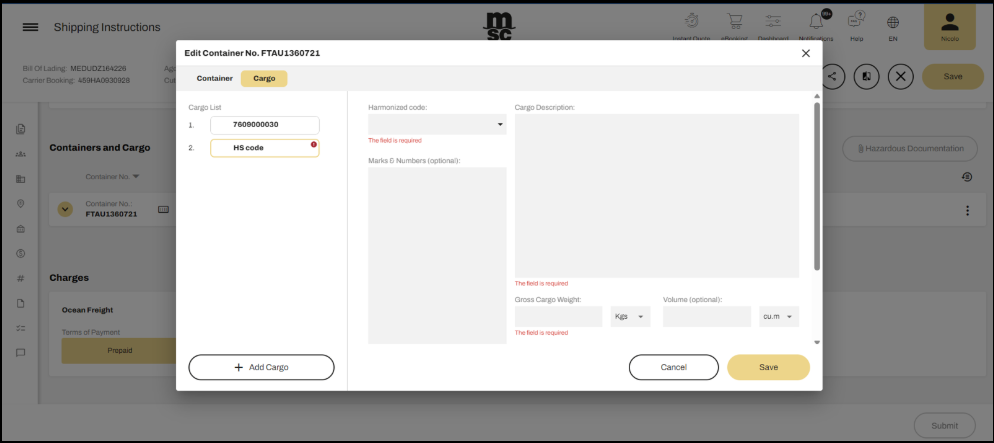
Nhấp vào ‘Edit Cargo/Chỉnh sửa Hàng hóa’ để cập nhật thông tin hàng hóa (Click on the ‘Edit Cargo’ button to edit the Commodity Details). Cửa sổ ‘Cargo’ sẽ mở ra (The ‘Cargo’ pop up window will open). Thay đổi các thông tin cần thiết và nhấn ‘Save/Lưu’ (Provide the needed changes and and click on ‘Save’).
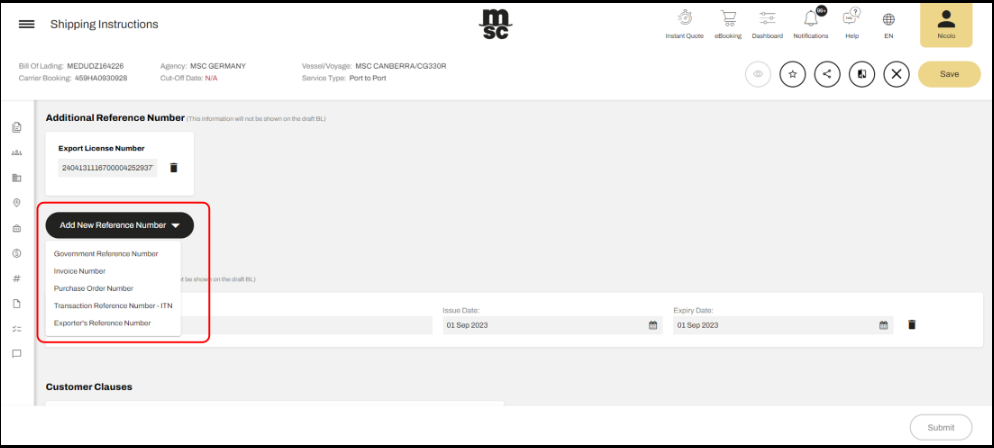
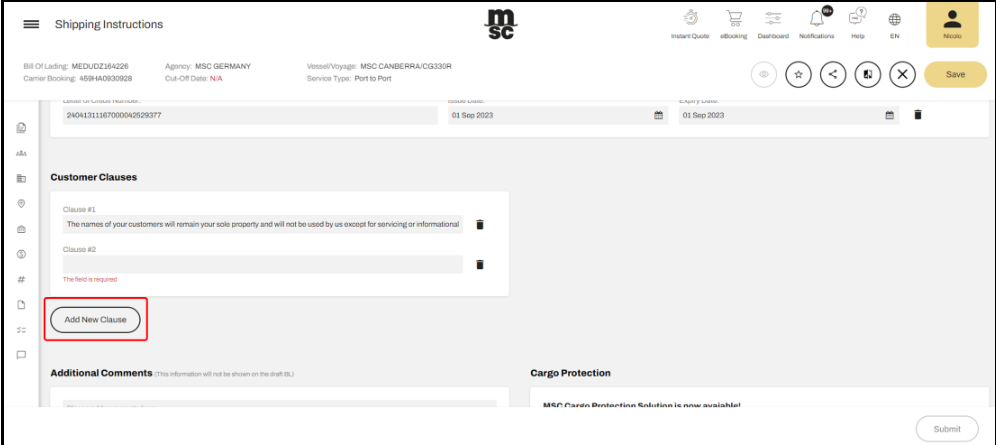
Tương tự, bạn có thể Thêm/Chỉnh sửa thông tin trong các mục sau (Similarly, you can Add/Edit details into the following sections):
Điều kiện thanh toán (Terms of Payment) trong phần Cước phí (under ‘Charges’ section)
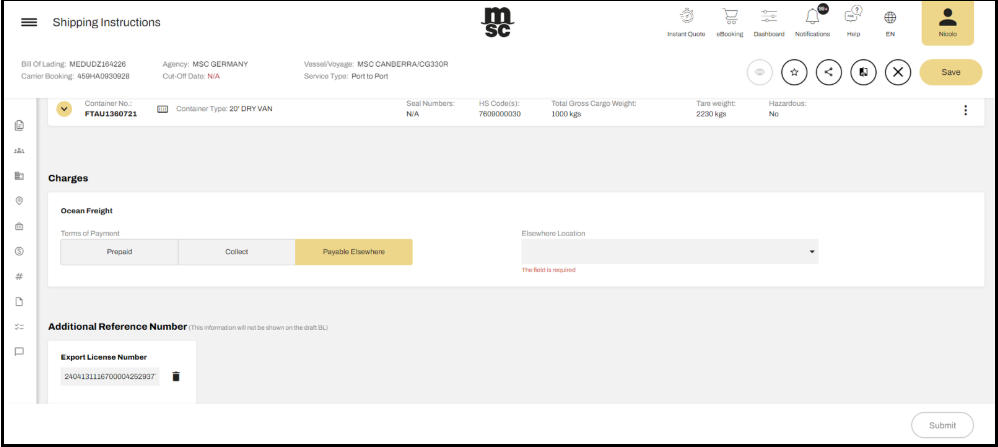
Số tham chiếu bổ sung (Additional Reference Numbers)
Điều khoản khách hàng (Customer Clauses)
Thư tín dụng (Letter of Credit)
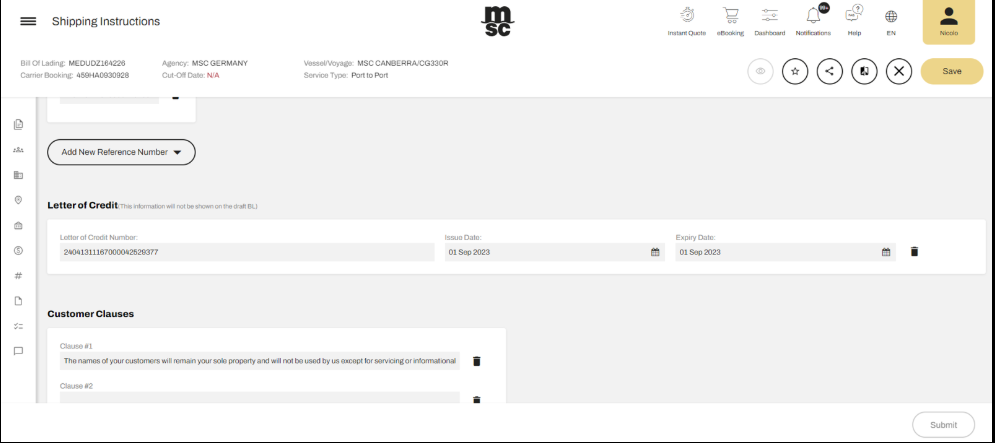
Mọi bình luận liên quan đến ‘shipping instruction/hướng dẫn vận chuyển’ có thể được nhập vào phần ‘Additional Comments/Bình luận bổ sung’ (Any comments related to the ‘shipping instruction’ can be specified in the ‘Additional Comments’ section).

Sử dụng thanh công cụ phía trên, bạn có thể thực hiện các thao tác sau (Using the top toolbar you have the possibility to):
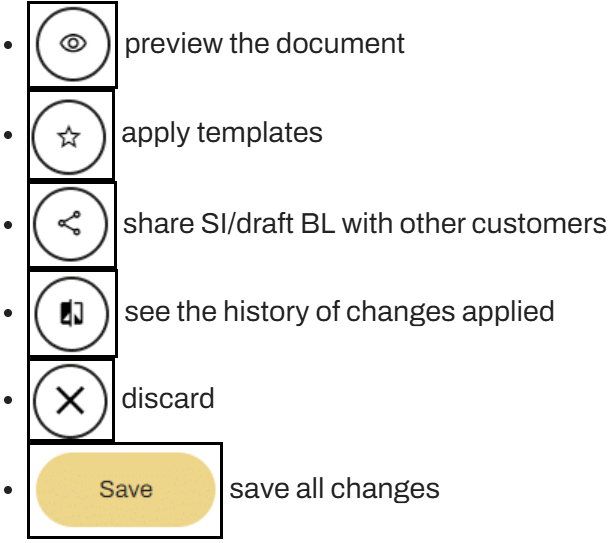
PREVIEW_ICON – Xem trước tài liệu (preview the document)
TEMPLATE_ICON – Áp dụng mẫu lưu sẵn (apply templates)
SHARE_ICON – Chia sẻ Shipping Instruction (SI) / bản nháp Vận đơn (BL) với khách hàng khác (share SI/draft BL with other customers)
LOG_ICON – Xem lịch sử thay đổi đã được áp dụng (see the history of changes applied)
CLOSE_ICON – Hủy bỏ thay đổi (discard)
SAVE_ICON – Lưu tất cả thay đổi (save all changes)
Khi nhấp vào nút ‘Save/Lưu’, hệ thống sẽ hiển thị thông báo thành công (On clicking ‘Save’, the system displays a success message), cho biết rằng Shipping Instruction đã được lưu thành công (stating that the ‘Shipping Instruction was successfully saved).
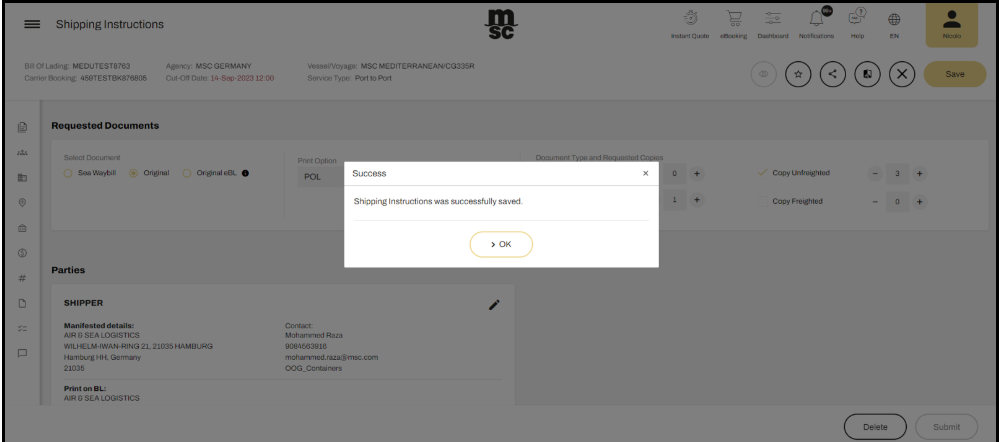
Nhấp vào OK để thoát cửa sổ bật lên (Click on ‘OK’ to exit the pop up), Shipping Instruction sẽ được lưu dưới dạng ‘Draft/Bản nháp’ (the Shipping Instruction will be saved as a ‘Draft’).
Xem lại bản nháp và nhấp vào nút ‘Submit/Gửi’ Shipping Instruction (Review the draft and click on ‘Submit’ Shipping Instruction button).
Một cửa sổ bật lên hiển thị thông báo xác nhận (A confirmation message pops up) với nội dung Shipping Instruction đã được gửi thành công đến đại lý (stating, ‘Shipping Instructions was successfully sent to the agency’).
Click on OK to exit the pop up (Nhấp vào OK để thoát cửa sổ bật lên) và quay lại màn hình Shipping Instructions – Dashboard (and navigate back to the ‘Shipping Instructions – Dashboard’ screen) nơi trạng thái sẽ hiển thị là ‘Sent to MSC/Đã gửi đến MSC’ (Sent to MSC) (displaying the status as ‘Sent to MSC’). Sau khi eSI được xử lý bởi đại lý (Once the eSI has been processed by the agency), trạng thái sẽ được cập nhật thành ‘Bản nháp chờ khách hàng phê duyệt/Draft Pending Customer Approval’ (the status will be updated as ‘Draft Pending Customer Approval’).
Khi bạn nhấp vào biểu tượng Approve SI (When you click on the Approve SIICON5 icon), một cửa sổ bật lên thông báo xác nhận sẽ xuất hiện như hình dưới đây (a confirmation message will appear as shown below).
Nhấp vào ‘Confirm/Xác nhận’ để xác nhận và thoát khỏi cửa sổ bật lên (Click on ‘Confirm’ to confirm and exit the pop-up message). Lúc này, trạng thái sẽ thay đổi thành ‘Customer Approved/Được khách hàng phê duyệt’ (Now, the status will be changed to ‘Customer Approved’).
Bạn cũng có thể phê duyệt eSI bằng cách mở Shipping Instruction ở chế độ ‘Edit/Chỉnh sửa’ (You can also ‘Approve’ the eSI by opening the ‘Shipping Instruction’ in the ‘Edit’ mode). Sau đó nhấp vào nút ‘Approve/Phê duyệt’ (Click on the ‘Approve’ button).
Một thông báo thành công sẽ xuất hiện như hình dưới đây (A Success message will appear as shown below).