myMSC FAQ | eBooking | Create new booking | Step 4: Parties
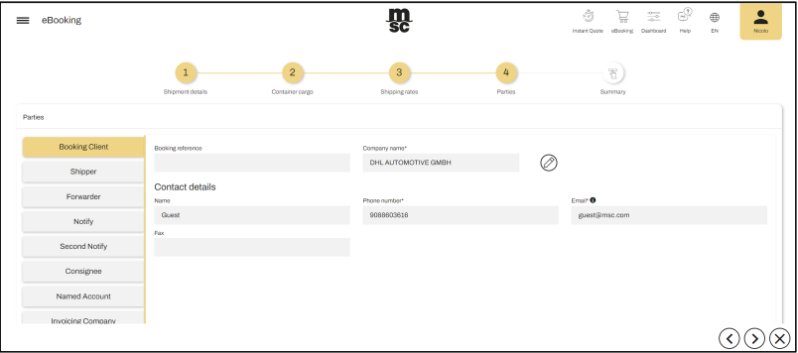
Nếu bạn được đăng ký với nhiều đại lý (If you are registered with more than one agency), hãy chọn Văn phòng đặt chỗ phù hợp từ trường chỉ định (select the appropriate Booking Office from the designated field). Khi chọn văn phòng đặt chỗ (Upon selecting the Booking Office), một số thông tin như Tên, Số điện thoại, Số fax và Địa chỉ email sẽ được tự động điền dựa trên hồ sơ đăng ký của bạn (some information’s are auto populated based on your registration details like Name, Phone Number, FAX and Email ID).
Nhập các thông tin cần thiết trong phần ‘Booking Client Information/Thông tin khách hàng đặt chỗ’ (Provide the necessary information’s in the Booking Client Information Section).
Khi nhấp vào tên của bất kỳ bên nào (On clicking any of the party name), hệ thống sẽ cho phép bạn nhập thông tin chi tiết của bên đó (it will allow you to enter the details).
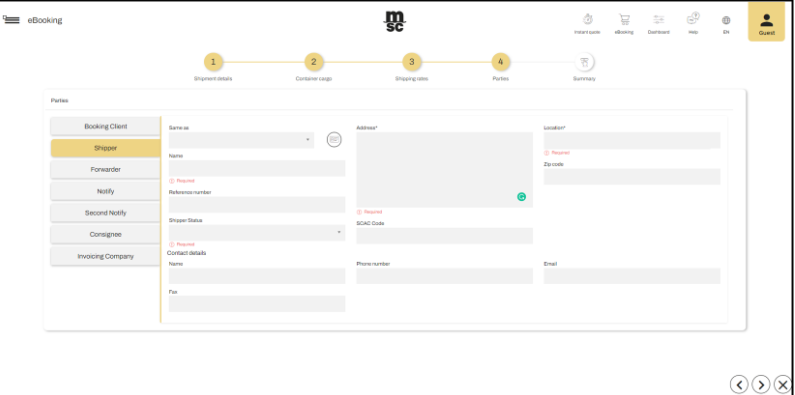
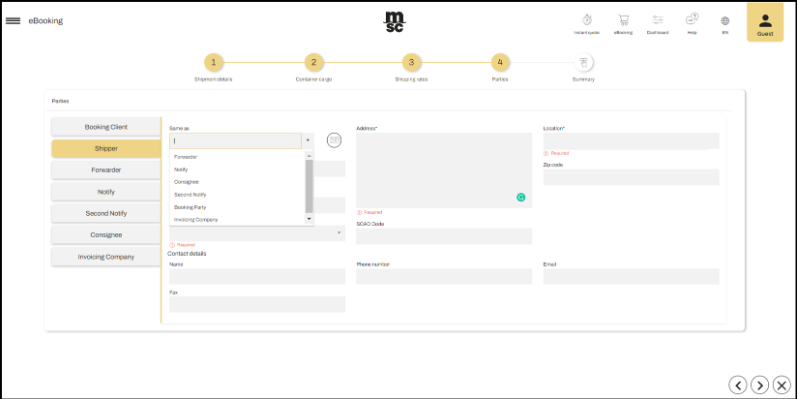
Việc điền thông tin của các bên liên quan là không bắt buộc (It is not mandatory to fill in the party details). Tuy nhiên, nếu bạn có thông tin (But still if you have the information), bạn có thể điền vào (you can fill in the details). Nếu muốn sao chép thông tin từ ‘Booking Party/Bên đặt chỗ’ (At any time if you wish to copy the same details from the Booking Party) hoặc một bên khác đã có sẵn thông tin (or some other parties where the details are already filled in), bạn có thể chọn bên phù hợp trong trường ‘Same As/Giống như’ (you can choose relevant party from the ‘Same As’ field).
Nhấp vào nút ‘Next/Tiếp theo’ để chuyển sang bước tiếp theo (‘Click’ on the ‘Next’ button to navigate to the next section).
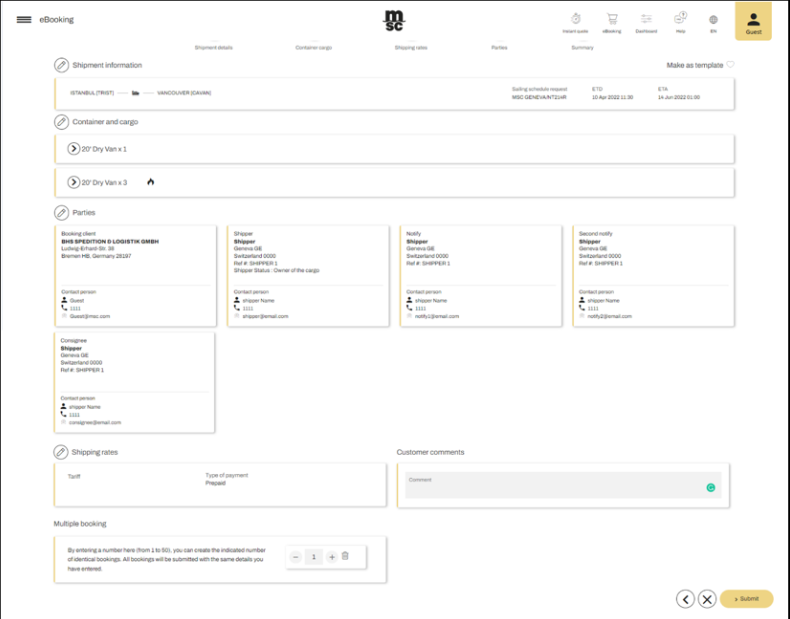
Tại đây, bạn có thể xem lại tóm tắt eBooking (Here you can review the eBooking summary), khi đã xác nhận thông tin là chính xác, bạn có thể gửi yêu cầu (and once convinced that the details are correct. You can submit the same).
Nếu cần chỉnh sửa thông tin trước khi gửi (Before submitting the eBooking, at any time if you wish to modify the details), nhấp vào nút ‘Edit/Chỉnh sửa’ (click on the ‘Edit’ button) để thực hiện thay đổi cần thiết và lưu lại (and do the necessary changes and save it).
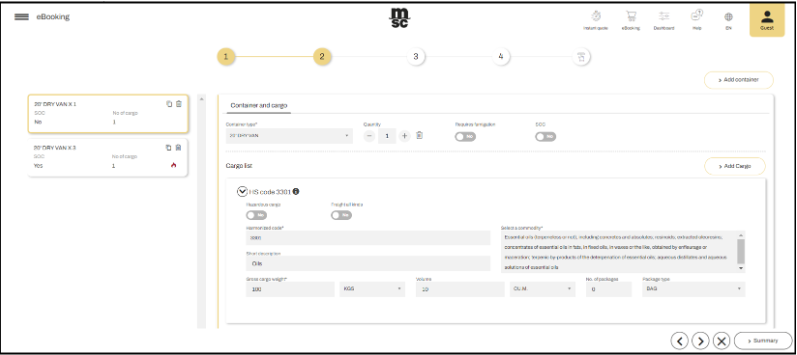
Hệ thống sẽ mở rộng phần nội dung để bạn có thể chỉnh sửa chi tiết (The grid will expand and allow you to edit the details).
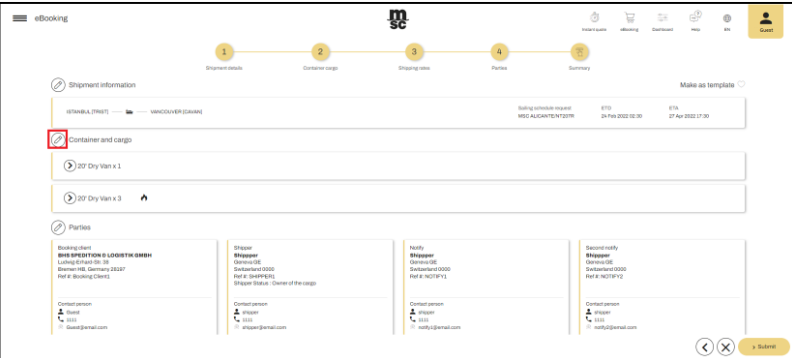
Sau khi nhấp vào nút Edit (After clicking on the edit button), hệ thống sẽ điều hướng đến phần tương ứng để bạn cập nhật thông tin (the system navigates to the respective stage as shown below).
Nhấp vào nút ‘Submit/Gửi’ để hoàn tất quá trình tạo eBooking (Click on ‘Submit’ button to complete the eBooking creation process).
Sau khi gửi, hệ thống sẽ hiển thị Thông báo xác nhận eBooking kèm theo Mã số eBooking (An eBooking Confirmation message will be displayed with the eBooking Number).
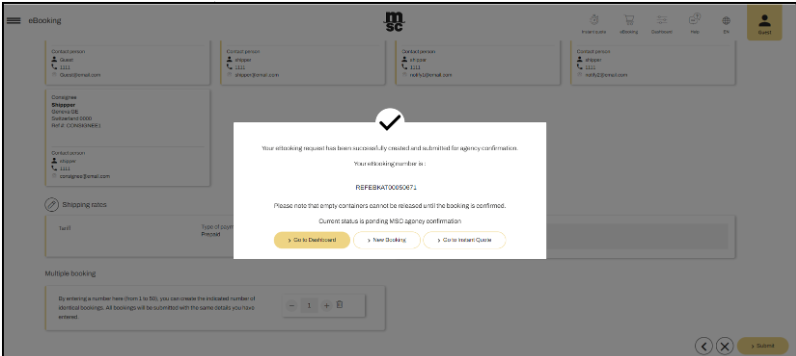
Nhấp vào ‘Go to Dashboard/Đi đến bảng điều khiển’ (Click on ‘Go to Dashboard’), để kiểm tra trạng thái của eBooking (to view the status of your ‘eBooking’).
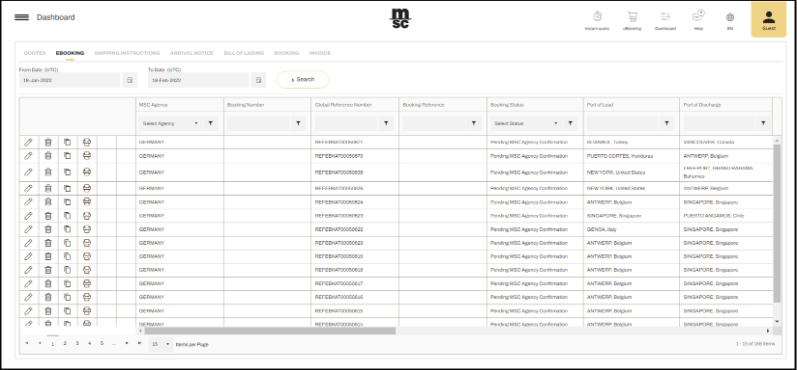
Để xem lại tóm tắt eBooking (To view the eBooking summary), nhấp vào biểu tượng (click on the icon).
Để hủy đặt chỗ đã gửi (To cancel the submitted booking), click on the icon
Để tạo bản sao của eBooking đã gửi (To create copy of the submitted booking), click on the icon.
Để in tóm tắt eBooking (To print the eBooking summary), click on the icon.